|
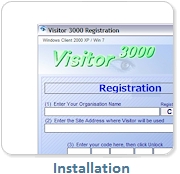
Installation:
After having
downloaded and inflated the ZIP file, you should run
the file setup.exe to start the installation process.
The installer will default to overwriting any
Visitor installation it finds but no data
should be lost. However, installation processes are
deceptively complex businesses, on occasions things
can, and do, go wrong, so it's always a good idea to
ensure your data is backed up prior to starting any
installation.
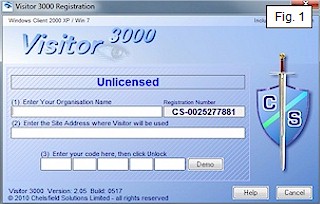
If you don't yet have
a license key, you may run Visitor in demo mode by
simply clicking the Demo button. The demonstration
mode has strictly limited functionality:
If for
any reason an error has been made in entering the
unlock code or any of the other details, then Visitor
will show Registration Failed.
There is no limit to the number of attempts you may
make to register your product.
|

|
 Demonstration
Mode Demonstration
Mode
Once Visitor has
been installed and launched for the first time it
will present a license screen as seen if Fig. 1.
This dialogue will always be shown whenever Visitor
starts, that is until you enter an unlock code.
In the demonstrator mode you can create, save,
delete and edit visitor bookings but only one fixed
ID pass can be printed by the system. In addition
you may print the month and day bookings lists. The
system will not allow you to change the in-out
status of visitors. You cannot save, or manage
photographs and whilst you can enter the system
settings dialogue you are not permitted to save
changes.
Unlocking Your
Software
The process of
unlocking the program is very quick and simple. Once
you have paid for your license key, simply contact
us by phone or e-mail. To make this quick and very
easy, we suggest that you sit in front of your
computer when telephoning us. You will need the
following information:
1.
Organisation Name:
Note that this name forms part
of your license identity and
will appear on each of the
printed lists and at the top
left hand corner of each pass
you issue.
2. Organisation
Address: This address
should be the site address at
which the software is used and
it should include a post code.
The address you give forms part
of your license identity.
3. Your
Registration Number:
You will need to tell us this
number which can be found in the
Registration Number box on the
Visitor License Screen. |
The precise details
you give will be entered into our system and then we
will be able to return your 21 character unlock code
which should be entered into the Visitor license
screen as shown below:
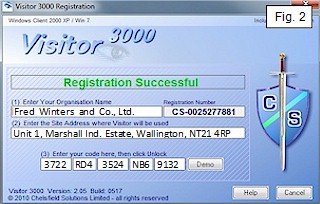
After receiving and entering your code, simply click
the Unlock button to register your product. Visitor
will show Registration
Successful, as seen in Fig. 2. The
license screen will then disappear and will not not
reappear when you next launch Visitor. Your
registration details are always available by
clicking the Chelsfield Logo in the top right-hand
corner of the main screen.
|